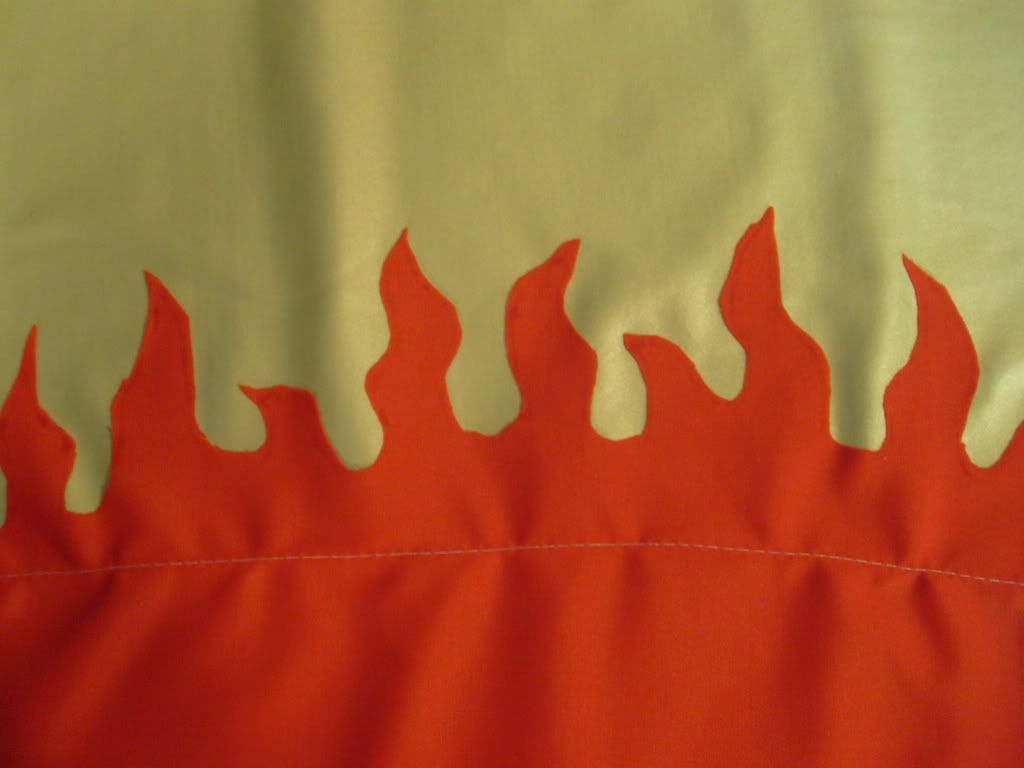
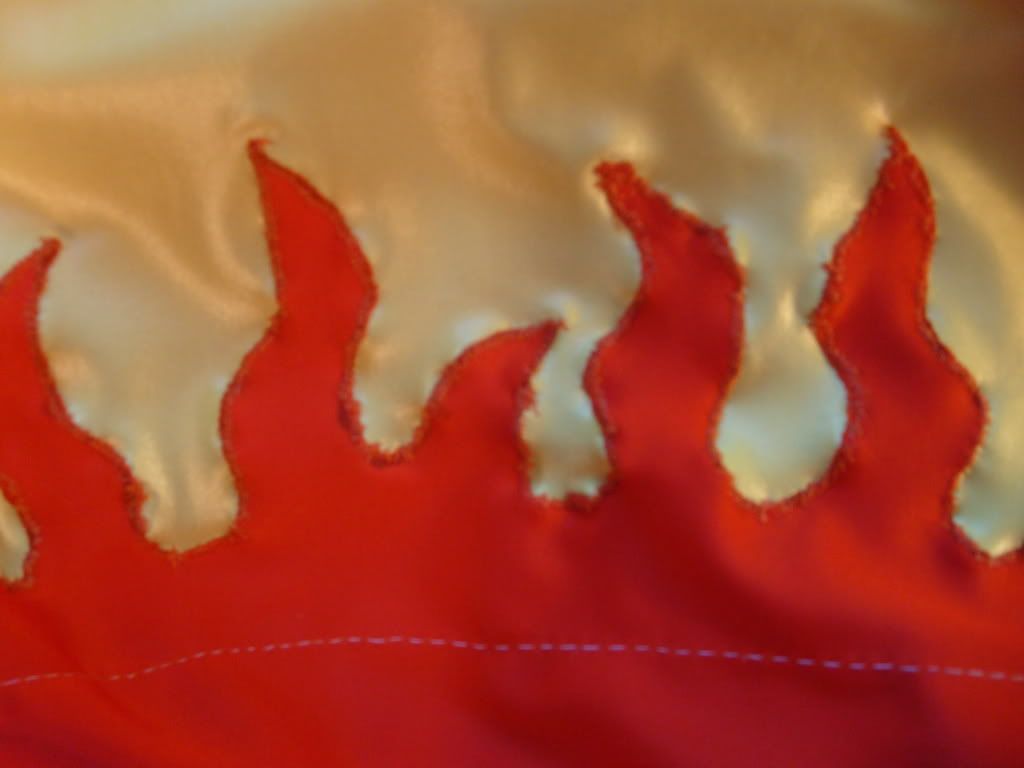
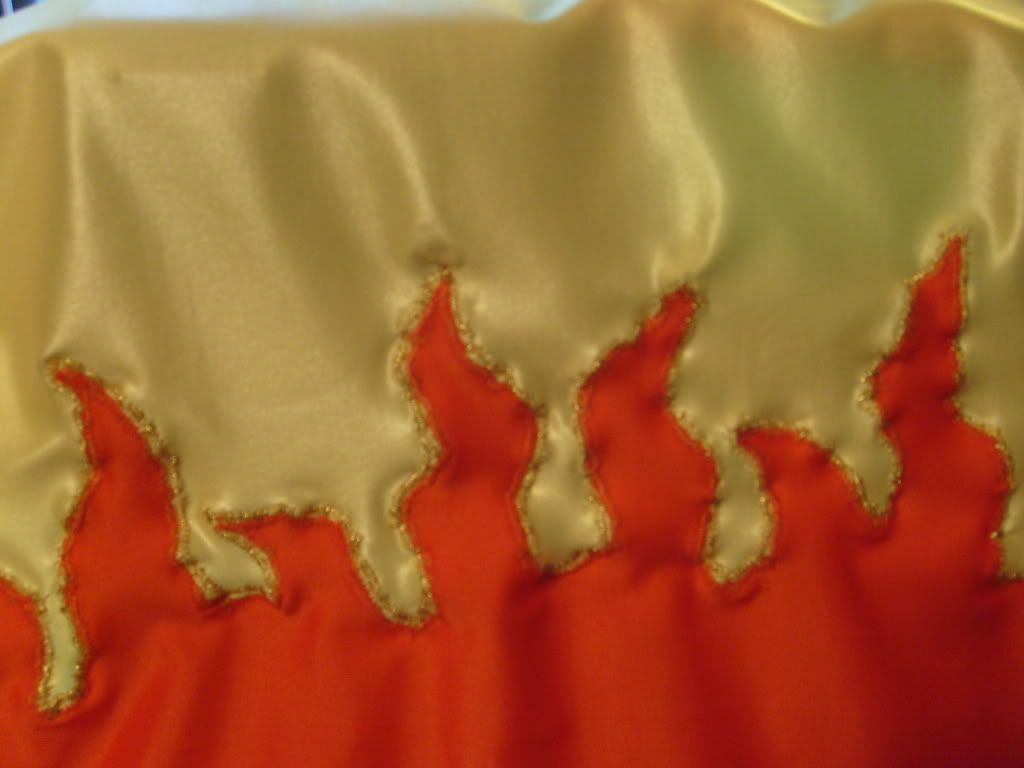
 Ok, I found the camera and here are some close ups of how I created the signature flame designs on Firestar. I decided to go with two layers: a spandex layer and the accessories layer. The spandex layer was tricky.
I had traced the flame pattern from the boot cuffs I bought onto the orange spandex including the portion that would be the lower leg. I put in a basting stitch just to hold the yellow to the orange about an inch below the flames (top picture). I tried stitching from there but all the curves of the flames were not cooperating so I had rip out the stitches, glue down the flames and wait a day to stitch over it; this did cause a lot of jamming which I was expecting. You can't stitch successfully through glue but I wanted stitches not just glue.
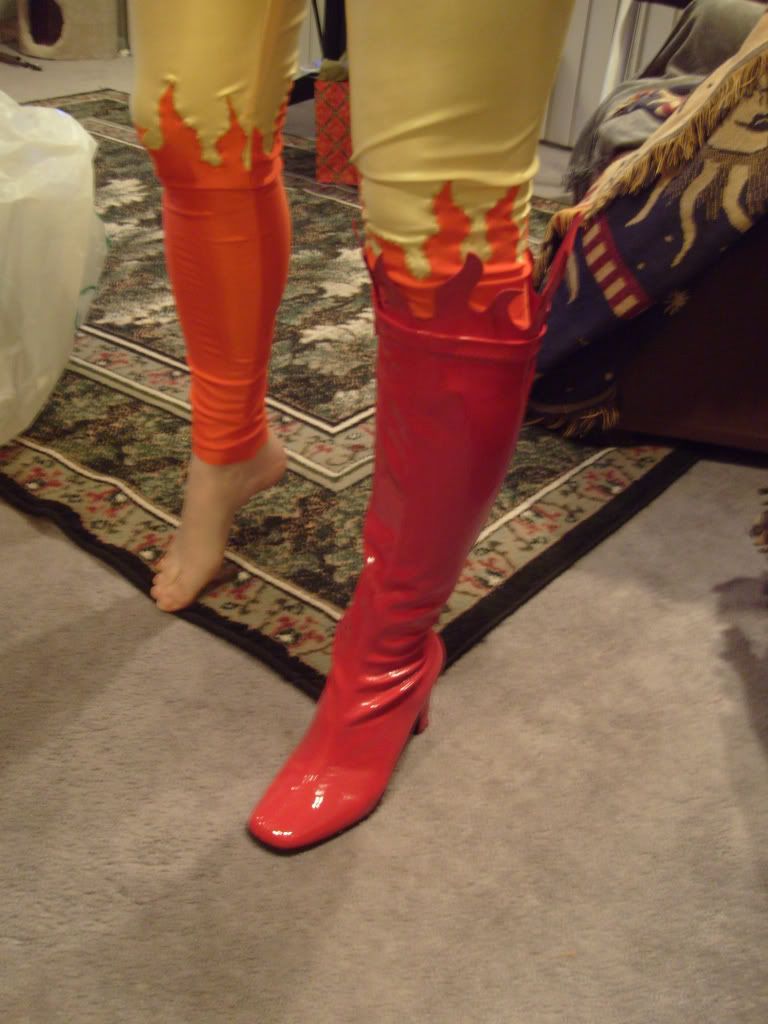
I was worried that the height of the boot toppers would cover the spandex layer but it came out just right. Since the cuffs aren't attached to the boots, I can lower them to the right height. (bottom picture)
No comments:
Post a Comment